Still have a ton of work to do, but I'm happy where this is going!
1. Assembly. I was pretty surprised at how well this kit went together. Feels like this kit really takes advantage of kits in CAD... There's a lot going on here. Honestly I'm not even sure if I'll field the Mortis Engine, it's just a neat kit. I've started using wall spackling paste for big bases, adds some texture and goes on very easily.
2. After some experimentation with the Black Coach, I found out that you get this neat visibly gritty texture if you prime black, then while still wet prime white from your chosen highlight direction. This helps add a bit of randomization to the texture for the next step.
3. Wash! Two coats of Games Worshop's
Coelia Greenshade.
4. A mixture of airbrushing and drybrushing on Games Workshop's
Hawk Turquoise. Also I did a quick and dirty pass of cheap acrylic brown on the base, no sense of using good paint here as it will be covered by flock.
5. Dead Grass flock on the base.
6. Primed the Chariot bit black.
7. Airbrushed Vallejo's
Model Air Gold. Very happy with their metallic paint line, gold over black never looked so good! You've really got to shake these bottles up before use though. Make sure to drop an object in the bottle to use as an agitator.
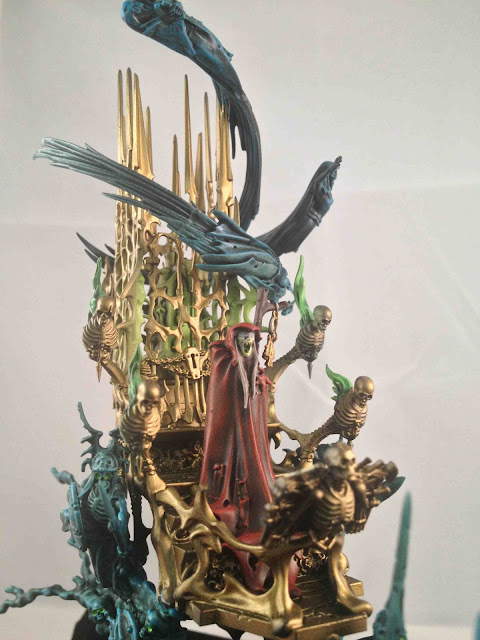
8. Airbrushed Vallejo's Game Color Livery Green at 20PSI onto the reliquary. I didn't really plan to do this, but it seems to be working out against the gold. I'm pretty sure I rushed this step for layering and details, there's some detail work that could be done on the reliquary if I wanted to... probably just get lost once the gate bit is added though.
9. Just a closer image of the reliquary. Definitely going to need to attempt some OSL to blend the Spririt Horde with the chariot bit. I've kept the chariot bit detached to do detail work.